Install Nextcloud on Ubuntu 22.04
Traducciones al EspañolEstamos traduciendo nuestros guías y tutoriales al Español. Es posible que usted esté viendo una traducción generada automáticamente. Estamos trabajando con traductores profesionales para verificar las traducciones de nuestro sitio web. Este proyecto es un trabajo en curso.
Nextcloud is a free and open source application for storing and sharing files. It allows approved users to access documents and pictures online from a central location. Nextcloud is considered a strong alternative to Dropbox and Google Drive. This guide explains how to download, install, and configure Nextcloud on Ubuntu 22.04 LTS. It also explains how to configure an Ubuntu LAMP stack to support Nextcloud.
What is Nextcloud?
Nextcloud advertises itself as a safe home for user data and documents. Developed with an open source philosophy in mind, Nextcloud provides users with much more control and flexibility than the alternatives. Some of the main advantages of Nextcloud include:
- Users can host documents on their own server and do not have to rely on other vendors for hosting.
- Finely-grained file access and sharing controls, along with workflow and audit logs.
- Included full-text search engine that can query the entire collection of files.
- Able to monitor and record all data exchanges and communications.
- Offers end-to-end client side encryption and key handling.
- Includes real-time notifications, comments, and multi-user editing.
- Prioritizes security through third-party reviews and a well-funded Security Bug Bounty program.
- Works together with the developer and user communities to develop, optimize, and test new features.
- Has an app store where users can download additional extensions and customizations.
See the Nextcloud feature comparison for a more complete analysis. For complete information on how to use Nextcloud, consult the Nextcloud product documentation.
Before You Begin
If you have not already done so, create a Linode account and Compute Instance. See our Getting Started with Linode and Creating a Compute Instance guides.
Follow our Setting Up and Securing a Compute Instance guide to update your system. You may also wish to set the timezone, configure your hostname, create a limited user account, and harden SSH access.
A LAMP Stack, including an Apache web server, a MariaDB/MySQL RDBMS, and the PHP programming language, must be installed before Nextcloud can be used. This guide includes instructions for installing the LAMP stack components. More information about installing a LAMP stack is available in the Linode guide to installing a LAMP stack on Ubuntu 22.04.
To properly use Nextcloud and secure the installation with HTTPS, configure a domain name for the server. For information on domain names and pointing the domain name to a Linode, see the Linode DNS Manager guide.
NoteThis guide is written for a non-root user. Commands that require elevated privileges are prefixed withsudo. If you are not familiar with thesudocommand, see the Users and Groups guide.
Installing the Nextcloud Prerequisites
Nextcloud requires a LAMP stack to work properly. This section provides instructions on how to install the Apache web server, MariaDB RDBMS, and the PHP programming languages. While these instructions are geared towards Ubuntu 22.04 users, they are also broadly applicable to Ubuntu 20.04.
NoteNextcloud only recently added support for PHP 8.1 in version 24. PHP 8.1 is the default PHP library package in Ubuntu 22.04. Earlier versions of Nextcloud must use PHP 7.4. This might require a downgrade of the local PHP packages.
Installing the Apache Web Server
To install and test an Apache web server on Ubuntu 22.04, follow these instructions.
Update and upgrade the Ubuntu packages:
sudo apt update && sudo apt upgradeInstall the Apache web server using
apt:sudo apt install apache2Configure the
ufwfirewall to allow theApache Fullprofile. This permits HTTP and HTTPS connections, enabling web access.OpenSSHconnections must also be allowed. Enableufwwhen all changes are complete.sudo ufw allow OpenSSH sudo ufw allow in "Apache Full" sudo ufw enableNote
TheApache Fullprofile permits HTTP and HTTPS traffic. To temporarily restrict web traffic to HTTP requests, use theApacheprofile instead. TheApache Secureprofile blocks HTTP requests and only permits HTTPS traffic through. Do not use this profile before enabling HTTPS on the server.Verify the firewall settings using the
ufw statuscommand:sudo ufw statusStatus: active To Action From -- ------ ---- OpenSSH ALLOW Anywhere Apache Full ALLOW Anywhere OpenSSH (v6) ALLOW Anywhere (v6) Apache Full (v6) ALLOW Anywhere (v6)Enable the
mpm_preforkApache module and disablempm_event:sudo a2dismod mpm_event sudo a2enmod mpm_preforkRestart Apache using the
systemctlutility:sudo systemctl restart apache2Ensure the web server is still active using
systemctl:sudo systemctl status apache2Visit the IP address of the web server and confirm the server is working properly:
http://your_IP_address/Note
Use the Linode Dashboard to find the IP address for the Ubuntu system.The default Ubuntu/Apache2 welcome page appears in the browser. The page features the message “It works” and details some basic information about the server:
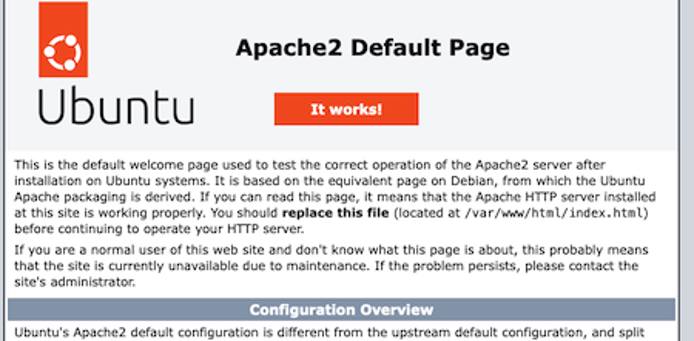
For more information about configuring the Apache HTTP Server, see the Apache Documentation.
Installing the MariaDB RDBMS
Nextcloud stores its information inside an RDBMS, such as MySQL or MariaDB. This guide uses MariaDB. MariaDB is very similar to MySQL, but it more closely follows the open source philosophy. MariaDB provides more features than MySQL does. It also has better performance and usability.
To install MariaDB on Ubuntu 22.04, follow the steps in this example.
Install MariaDB using
apt:sudo apt install mariadb-serverVerify the status of MariaDB to ensure it is installed correctly:
sudo systemctl status mariadbEnable MariaDB in
systemctlso it automatically activates upon server boot up:sudo systemctl enable mariadbConfigure and secure MariaDB using the
mysql_secure_installationutility:sudo mysql_secure_installationEnter your password. It is not necessary to switch to Unix socket authentication or change the root password. Answer
Yto the following questions:Remove anonymous users?Disallow root login remotely?Remove test database and access to it?Reload privilege tables now?
For further information about MariaDB, consult the MariaDB Server Documentation.
Creating the Nextcloud database in MariaDB
When MariaDB is installed, create a new database for Nextcloud to use. It is also necessary to create a user for the database and grant this user additional permissions. To configure the database, follow these instructions.
Log into MariaDB as the
rootuser. If you added a root password, provide it when requested. The MariaDB prompt appears.sudo mysql -u rootWelcome to the MariaDB monitor. Commands end with ; or \g. Your MariaDB connection id is 37 Server version: 10.6.7-MariaDB-2ubuntu1.1 Ubuntu 22.04 Copyright (c) 2000, 2018, Oracle, MariaDB Corporation Ab and others. Type 'help;' or '\h' for help. Type '\c' to clear the current input statement. MariaDB [(none)]>Create the
nextclouddatabase. For this and all remaining commands, MariaDB should reply withQuery OK.CREATE DATABASE nextcloud;Use the
SHOW DATABASEScommand to ensure the database has been properly created:SHOW DATABASES;+--------------------+ | Database | +--------------------+ | information_schema | | mysql | | nextcloud | | performance_schema | | sys | +--------------------+ 5 rows in set (0.001 sec)Create a user and grant them all rights to access the database. In place of
password, provide a more secure password.GRANT ALL PRIVILEGES ON nextcloud.* TO 'nextcloud'@'localhost' IDENTIFIED BY 'password';Flush the privileges to apply the recent changes:
FLUSH PRIVILEGES;Exit the database:
quit
Installing PHP and Other Components
Nextcloud uses the PHP programming language. Nextcloud version 24 supports PHP release 8.1. This is also the default release of PHP in the Ubuntu packages, so the regular php package can be installed. However, PHP 7.4 is required to use earlier versions of Nextcloud.
NoteTo install PHP 7.4, substitutephp7.4in place ofphpfor all packages. For example,php-clibecomesphp7.4-cli.
To install PHP and the other required packages, use these commands.
Install the core PHP package using
apt:sudo apt install phpConfirm the PHP release number:
php -vPHP 8.1.2-1ubuntu2.6 (cli) (built: Sep 15 2022 11:30:49) (NTS)Install the remaining PHP components:
sudo apt install php-apcu php-bcmath php-cli php-common php-curl php-gd php-gmp php-imagick php-intl php-mbstring php-mysql php-zip php-xmlEnable the necessary PHP extensions:
sudo phpenmod bcmath gmp imagick intlInstall the
unziputility. This utility might already be installed on the system.sudo apt install unzipInstall the
libmagicpackage:sudo apt install libmagickcore-6.q16-6-extra
Downloading, Installing, and Configuring Nextcloud
Nextcloud can be downloaded using wget. After unzipping the downloaded file, a virtual host must be created for Nextcloud. Some additional configurations and optimizations must also be applied to the system.
Downloading and Installing Nextcloud
To download and install Nextcloud, follow these steps.
Download Nextcloud using
wget. To find the URL for the latest stable release of Nextcloud, visit the Nextcloud installation page. This page provides a link to the latest Nextcloud zip file. To locate a particular release of Nextcloud, consult the Nextcloud changelog and archive. The following example demonstrates how to download the Nextcloud release 24.0.1.wget https://download.nextcloud.com/server/releases/nextcloud-24.0.1.zipUnzip the archive. This creates a
nextcloudfolder in the same directory as the zip file.unzip nextcloud-24.0.1.zip(Optional) Delete or rename the archive after unzipping the contents. It is also possible to rename the
nextclouddirectory to a more meaningful name, such asnextcloud.yourdomainname.Change the folder permissions for the
nextclouddirectory:sudo chown -R www-data:www-data nextcloudMove the new directory to the server directory. The server directory usually defaults to
/var/www/htmlon most servers.sudo mv nextcloud /var/www/htmlDisable the default Apache landing page:
sudo a2dissite 000-default.confNote
Ignore the advisory to reload Apache at this time. Apache should be reloaded later when all configuration is complete.
Creating a Virtual Host File for Nextcloud
This section explains how to configure a virtual host file for the Nextcloud application. The virtual host tells Apache how to handle and serve requests for the Nextcloud domain.
Create a new file in the
etc/apache2/sites-availabledirectory and name the filenextcloud.conf:sudo nano /etc/apache2/sites-available/nextcloud.confThe file must include the following information. The
DocumentRootis the name of the server directory followed by/nextcloud. For theServerNameattribute, enter the actual name of the domain instead ofexample.com. Save the file when all changes have been made.- File: /etc/apache2/sites-available/nextcloud.conf
 1
 2
 3
 4
 5
 6
 7
 8
 9
10
11
12
13
14
15
<VirtualHost *:80> DocumentRoot "/var/www/html/nextcloud" ServerName example.com <Directory "/var/www/html/nextcloud/"> Options MultiViews FollowSymlinks AllowOverride All Order allow,deny Allow from all </Directory> TransferLog /var/log/apache2/nextcloud_access.log ErrorLog /var/log/apache2/nextcloud_error.log </VirtualHost>
Enable the site. Do not reload Apache yet.
sudo a2ensite nextcloud.confEnabling site nextcloud.
Optimizing PHP for Nextcloud
The default PHP implementation is fine for most applications. But certain PHP settings must be adjusted to allow for peak Nextcloud performance and operations. To make the necessary adjustments, follow these steps.
Edit the
php.inifile and make the following changes. In some cases, the parameter might be commented out and must be uncommented. To uncomment a parameter, delete the;character at the start of the line. Leave the remaining lines unchanged.Note
To locate the correct timezone for the
date.timezoneparameter, consult the PHP timezone documentation.If the server is running an earlier PHP release, substitute the actual release number in place of
8.1in the filename. For example, to configure PHP 7.4, the filename is/etc/php/7.4/apache2/php.inisudo nano /etc/php/8.1/apache2/php.ini- File: /etc/php/8.1/apache2/php.ini
 1
 2
 3
 4
 5
 6
 7
 8
 9
10
11
max_execution_time = 360 memory_limit = 512M post_max_size = 200M upload_max_filesize = 200M date.timezone = Europe/London opcache.enable=1 opcache.memory_consumption=128 opcache.interned_strings_buffer=8 opcache.max_accelerated_files=10000 opcache.revalidate_freq=1 opcache.save_comments=1
Enable some additional Apache modules:
sudo a2enmod dir env headers mime rewrite sslRestart the Apache server:
sudo systemctl restart apache2Verify the Apache server status and ensure it is still
active. If the server is in a failed state, examine the server error logs and make any necessary changes to the/etc/apache2/sites-enabled/nextcloud.conffile.sudo systemctl status apache2
Setting up Nextcloud Using the Web Interface
The remaining Nextcloud configuration tasks can be accomplished using the web interface. To configure and activate Nextcloud, follow these steps.
Visit the domain associated with the server. The Nextcloud configuration page appears in the browser window. In the following example, replace
example.comwith the name of the domain:http://example.com/.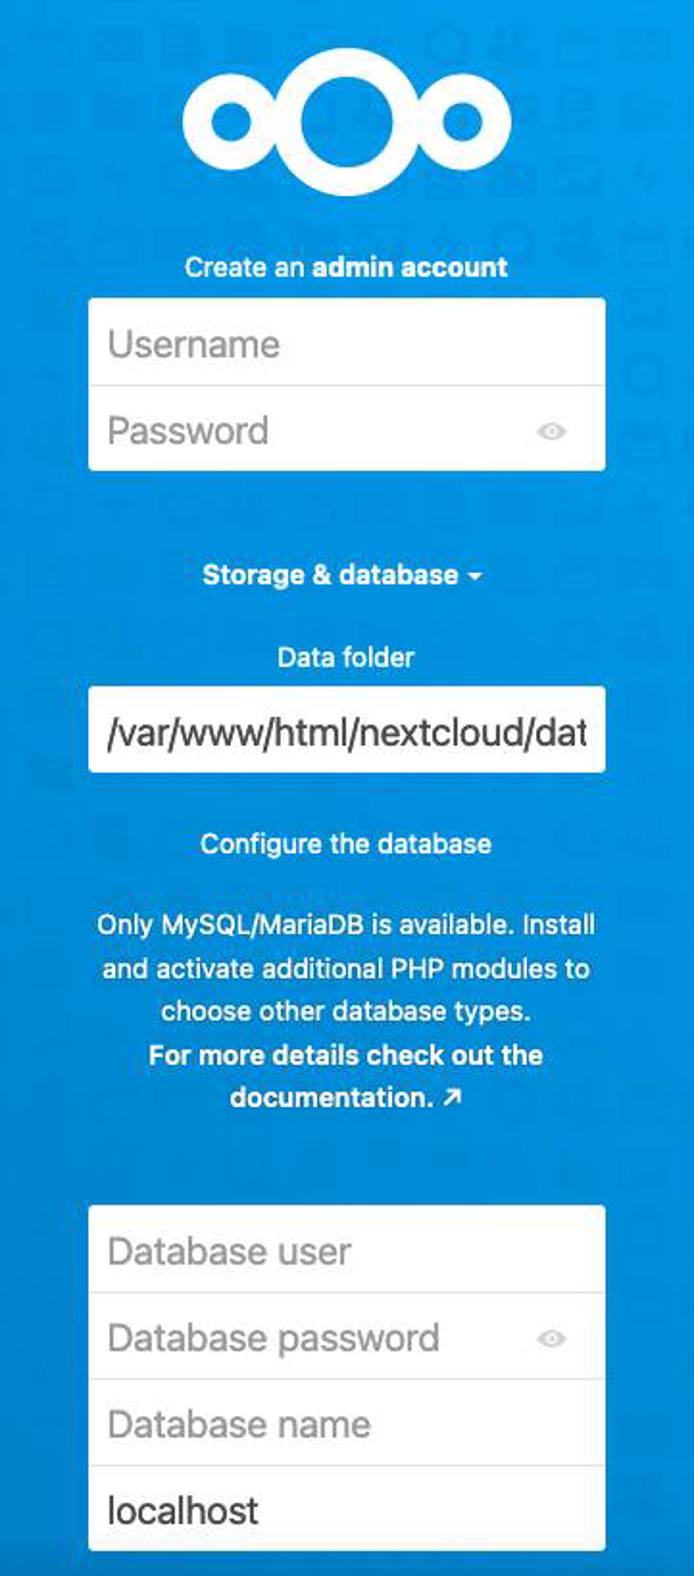
On this page, perform the following tasks:
- Create an administrative account. Provide a user name and password for the account.
- Leave the address for the Data Folder at the current value.
- In the Configure the database section, add information about the
nextclouddatabase. Enter the user name and password for the account created in MariaDB earlier. The database name isnextcloud. Leave the final field set tolocalhost. - Click Install to complete the form.
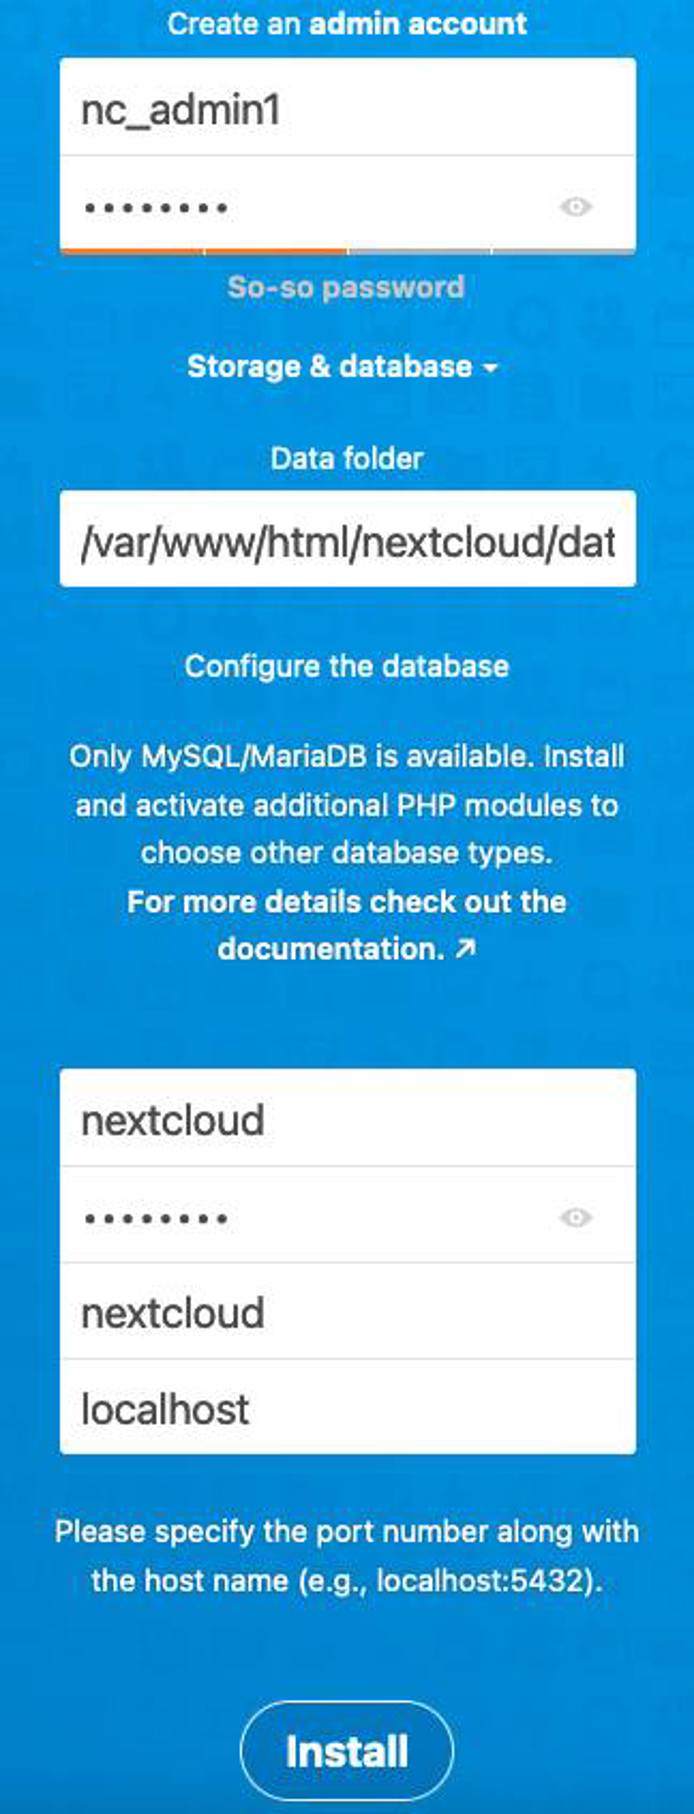
Nextcloud proceeds to set up the application. This might take a minute or two. On the next page, Nextcloud asks whether to install a set of recommended applications. Click Install recommended apps to continue.
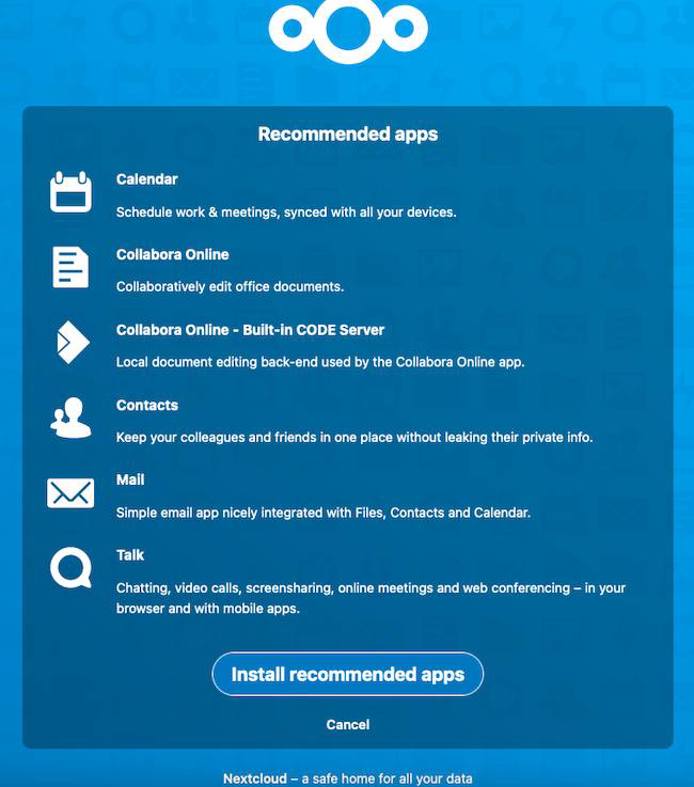
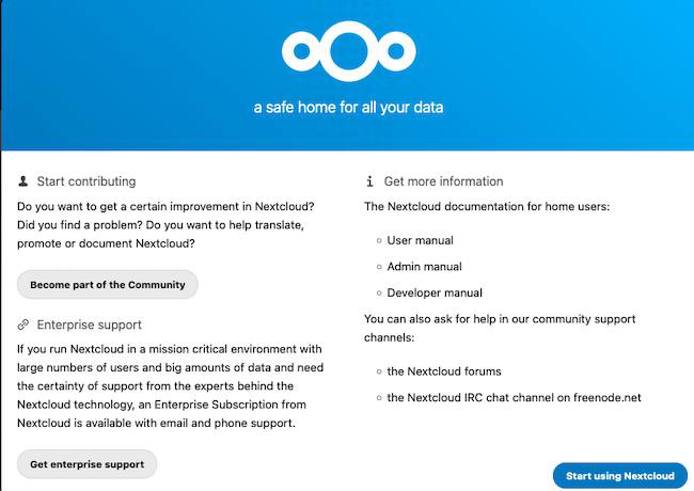
Nextcloud displays a series of welcome slides. Click the right arrow symbol on the right-hand side of the page to walk through the slides. Read through each slide, recording any important information.

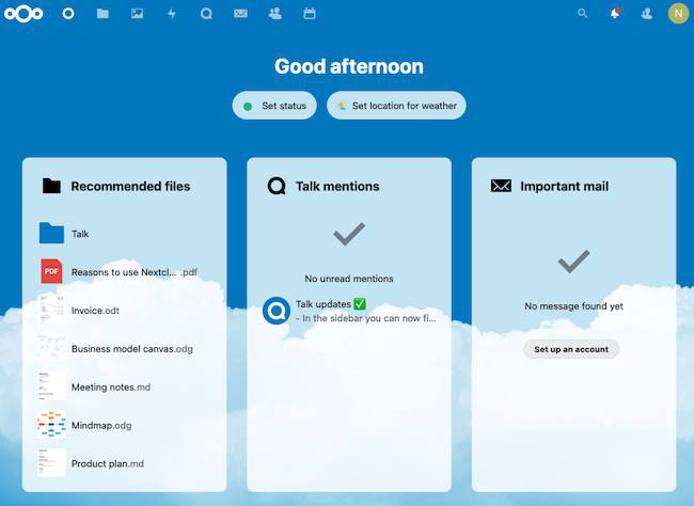
On the final welcome page, select Start using Nextcloud to proceed to the Nextcloud dashboard.
The browser now displays the Nextcloud Dashboard page.
Securing and Optimizing Your Nextcloud Application
Nextcloud is now ready to use. However, it is not as secure or as efficient as it could be. For a better Nextcloud experience, enable the Hypertext Transfer Protocol Secure (HTTPS) protocol using the
Certbot application. There are also a few more changes to add to the config.php file.
Setting up a SSL Certificate for Nextcloud (Optional)
Nextcloud works even without the Hypertext Transfer Protocol Secure (HTTPS) protocol. However, HTTPS is highly recommended, and Nextcloud displays some warnings on the “Settings” page if it is not configured. HTTPS encrypts information using the Secure Sockets Layer (SSL) technology to help secure the Nextcloud data.
The Linode server must possess a signed public-key certificate from a trusted certificate authority before it can accept HTTPS requests. Most Ubuntu administrators use Certbot to install SSL certificates. Certbot is a free and open source tool for automating the process of requesting Let’s Encrypt certificates for a website.
To configure HTTPS for the domain, follow these steps.
Update Snap, which is pre-installed on Ubuntu 22.04. Snap is used to download application bundles.
sudo snap install core && sudo snap refresh coreTo avoid conflicts, remove the default Ubuntu Certbot package:
sudo apt remove certbotUse
snapto install Certbot:sudo snap install --classic certbotcertbot 1.31.0 from Certbot Project (certbot-eff✓) installedUse Certbot to download a certificate for the domain:
sudo certbot --apacheCertbot begins the installation process. To receive a certificate, the following information is required. The workflow varies depending on whether you have used Certbot before. Enter the following information when requested to do so:
- A contact email for the domain owner.
- An acknowledgment of the terms of service. Enter
Yto proceed. - Whether to share the email address with the Electronic Frontier Foundation.
- The domain name to be registered. Enter the domain both with and without the
wwwprefix or choose it from a list.
After granting the certificate, Certbot displays some information about the granting process and the certificate. Take note of the location of the newly-deployed certificate. Additional configuration is added to this file in the next section.
Deploying certificate
Successfully deployed certificate for example.com to /etc/apache2/sites-available/nextcloud-le-ssl.conf
Congratulations! You have successfully enabled HTTPS on https://example.com
(Optional) Certbot can automatically renew and update the certificate. To perform a trial run, use the
renewcommand:sudo certbot renew --dry-run
Configuring Extra Security Measures for Nextcloud
At this point, almost all configuration is complete. The SSL configuration and the Nextcloud config.php file still require additional changes. The config.php file was created when configuring Nextcloud using the web interface. To complete all additional security tasks, follow these steps.
Change the permissions for the Nextcloud-specific
config.phpfile so other users cannot access it. This file is located inside theconfigdirectory in the Nextcloud domain directory.sudo chmod 660 /var/www/html/nextcloud/config/config.phpChange the ownership of this file. Ensure the
rootaccount and the Apache web server share co-ownership.sudo chown root:www-data /var/www/html/nextcloud/config/config.phpEdit the Nextcloud
config.phpfile and add the following two lines to the end of the array. Ensure these lines are placed inside the final)bracket. For thedefault_phone_regionuse the country code where the server is located. Consult the Wikipedia page for the ISO Alpha-2 codes for a full list of country codes. This example uses the country code for the United Kingdom.sudo nano /var/www/html/nextcloud/config/config.php- File: /var/www/html/nextcloud/config/config.php
1
2
3
4
... 'memcache.local' => '\\OC\\Memcache\\APCu', 'default_phone_region' => 'GB', );
Edit the SSL certificate file and enable strict transport security. You recorded the name of this file when installing the certificate. Add the following line immediately after the line containing the
ServerNameattribute.sudo nano /etc/apache2/sites-available/nextcloud-le-ssl.conf- File: /etc/apache2/sites-available/nextcloud-le-ssl.conf
1
2
3
... Header always set Strict-Transport-Security "max-age=15552000; includeSubDomains" ...
Restart Apache to apply the recent changes:
sudo systemctl restart apache2Reload the Nextcloud dashboard. The site is now using HTTPS, and the URL in the browser bar begins with
https://.Verify whether there are any warnings displayed in the Administration section of the Nextcloud Dashboard. First click the user ID icon in the upper-right corner of the dashboard and select Settings.
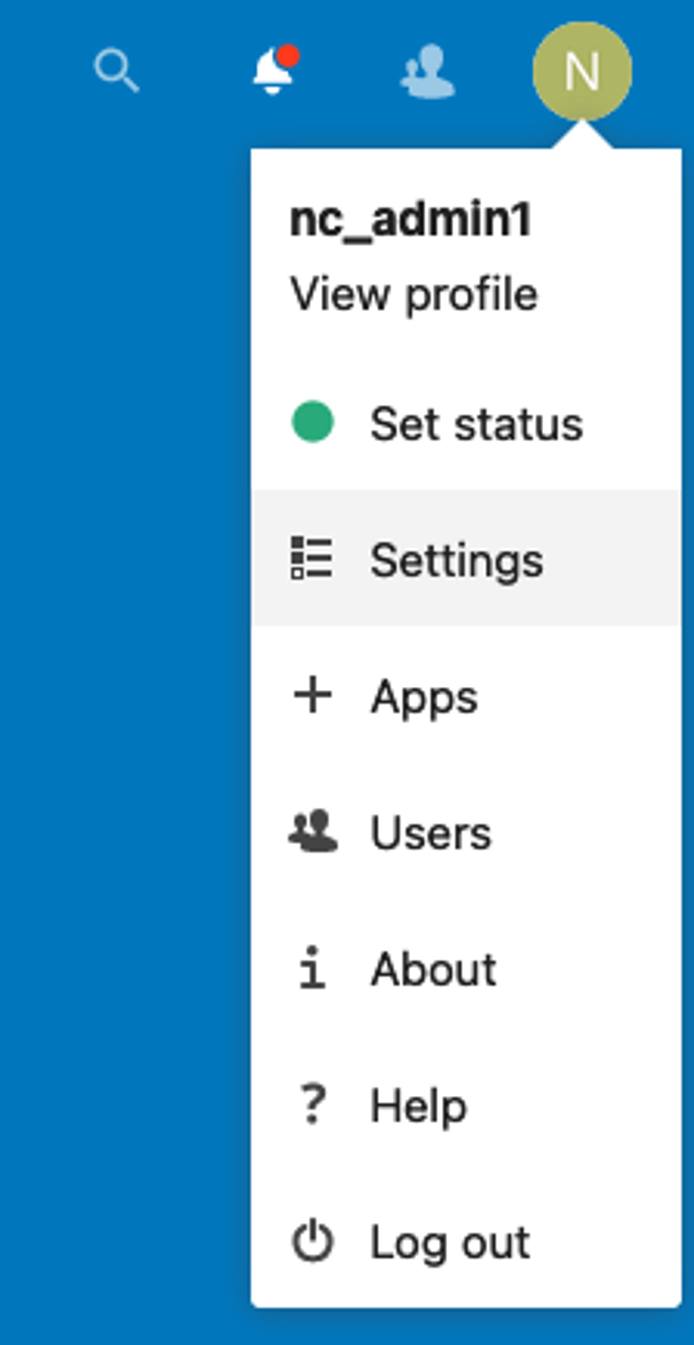
On the Settings section of the Dashboard, click Overview in the left-hand menu. This is located right under the Administration section heading.

Nextcloud now displays the “Security & Setup Warnings” page. Review the information in this section and ensure there are no security or configuration warnings. Some missing features, such as the email server, can be configured whenever it is convenient.

Concluding Thoughts about Nextcloud on Ubuntu 22.04
Nextcloud is a competitive open source alternative to Dropbox and Google Drive offering shared online access to files, folders, and other content. Nextcloud can be downloaded on Ubuntu 22.04 using wget and configured through a web interface. The Nextcloud dashboard allows users to administer the site and add or share files.
Nextcloud requires a LAMP stack, including configuration changes to the Apache web server, the MySQL/MariaDB RDBMS, and the PHP programming language. Nextcloud recommends installing an SSL certificate, permitting the use of HTTPS. For more information on how to install, configure, and use Nextcloud, consult the Nextcloud User Documentation.
More Information
You may wish to consult the following resources for additional information on this topic. While these are provided in the hope that they will be useful, please note that we cannot vouch for the accuracy or timeliness of externally hosted materials.
This page was originally published on
